
How to Update Your Mac Using Terminal
Most of us are used to updating our Mac’s software (macOS) using the Mac App Store – the traditional way of doing it. However, there is another method also available to update macOS: using Terminal. Using this method to update your Mac can save time and be easier for many, especially since the Mac App Store is known to lag on older devices. Many users have also reported updates download and install faster when installed using Terminal, so that’s another obvious advantage.
If you’re using multiple Macs connected to a server, you can simply run a script or remotely install an update without going through the struggle of accessing each device individually. For users running macOS Mojave or later, software updates have been moved to System Preferences, but the Terminal method is also still available.
This method uses a bunch of commands to allow Terminal to search for any available updates for your particular system and install them. We’ve detailed the entire method below to make it easy for you, so check it out.
Note: since updating software on any system is a core function, you’ll need your administrator password to proceed with any downloads and installations using Terminal.
1. Open Terminal on your Mac. You can do this by searching for it with Spotlight or by accessing “Applications -> Utilities -> Terminal” in Finder.
2. Type in the following command and press Enter:
softwareupdate -l
sudo softwareupdate -i 'NAME'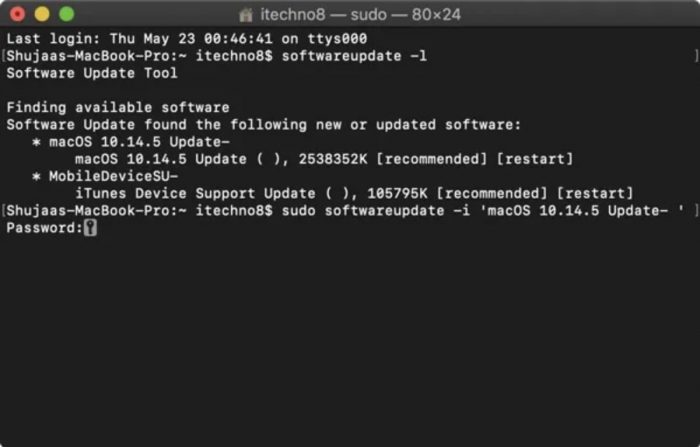
sudo softwareupdate -i 'macOS 10.14.5 Update- '
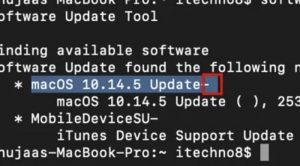
Tip: the name of the update – also known as the identifier – is the one written next to the star/bullet as highlighted below.
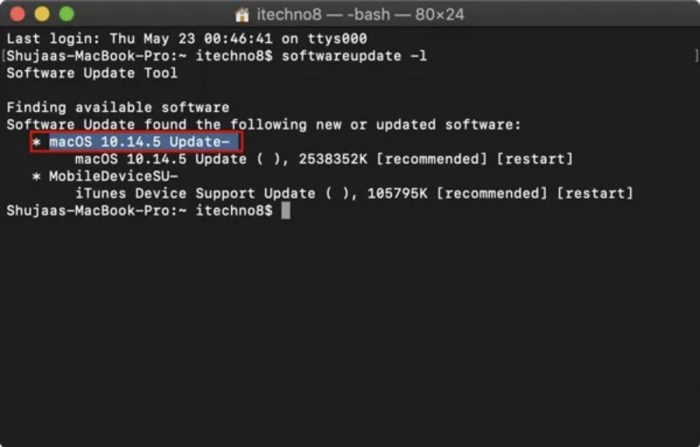
You need to make sure you type in the exact identifier for the update to download and install. Also be careful of any spaces / asterisks present at the end of the identifier as is the case in the update highlighted below.
If you want to install all available updates, simply use the following command instead:
sudo softwareupdate -i -a